
Snow Skin Mooncake 冰皮月饼
- Hypatias Foodlab

- Sep 29, 2018
- 3 min read
Updated: Nov 5, 2018
Snow Skin Mooncake冰皮月饼 (episode 1)
BY HYPATIASFOODLAB

Haiii, guys..this is my very first blog sharing recipes and I hope you guys enjoy reading it. It takes a while for me to start working on my food project this year. Everything can be difficult and overwhelming when you firstly start working on it, and finally, i am here. To tell you a little bit about myself and why i start working on this food project, i am a girl who lives in New York , who likes to make foods from scratch. I always tell my friends my kitchen is my laboratory where i incorporate various elements together and make the magic happen. To begin with, i’d like to write my first food blog and share the recipe that tells where i come from.
I make mooncake almost every year when the Mid-Autumn Festival is around the corner. Chinese have celebrated the harvest during the autumn full moon since the Shang Dynasty. This festival is a time to enjoy the successful reaping of rice and wheat with food offerings made in honor of the moon. Making and sharing mooncake become one of the symbolic traditions of the festival. In Chinese culture, a round shape usually symbolizes completeness and unity. There are different types of mooncake, the typical mooncakes are round pastries, usually filled with red bean paste/lotus seed paste(莲蓉)and salted duck egg which is surrounded by a thin crust. The one I am holding as the picture shown above is called “Snow Skin Mooncake”, which does not require baking skills. The snow skin is made of three main elements, 1) glutinous rice flour, 2) rice flour, 3) wheat starch. The custard filling consists of pineapple and pineapple juice, milk powder, coconut oil, egg, etc. To me personally, the taste of the pineapple custard filling is scrumptious~
Without further ado, let’s all put on our lab coat and start the experiment:
Snow Skin Mooncake
Prep Time: 1 Hour Cook Time: 2 Hours Serving: 8~9 Pieces
Ingredients Snow skin dough: Glutinous rice flour/糯米粉 45 g Rice flour/粘米粉 35 g Wheat starch/澄面 20 g Milk/牛奶 185 g Sugar/砂糖 50 g Vegetable oil/色拉油 20ml
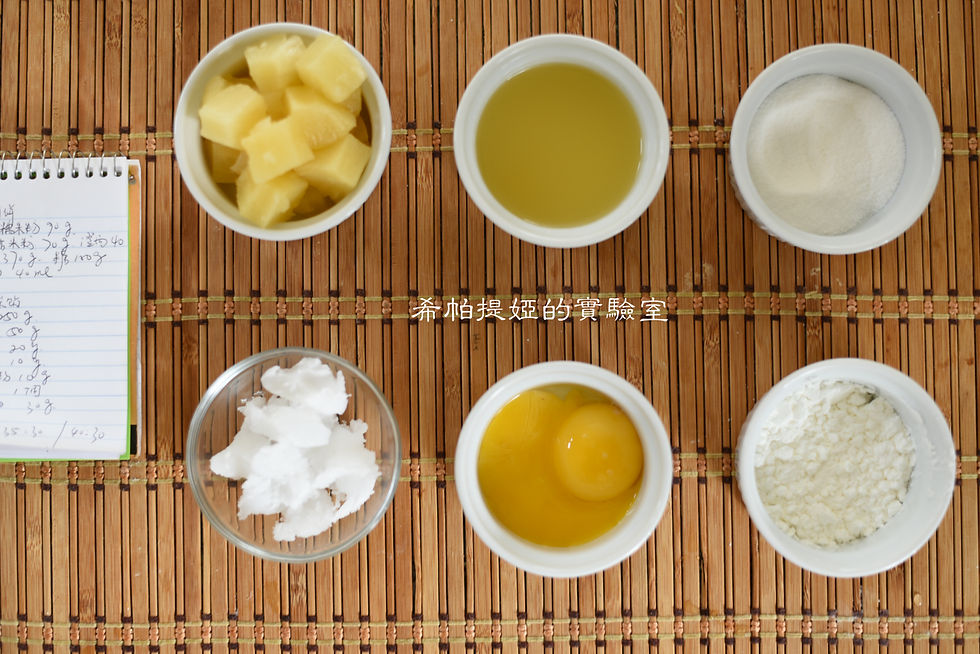
Custard filling: Pineapple/菠萝 250 g Pineapple juice/菠萝汁 50g Milk powder/奶粉 20 g Sugar/砂糖 20 g Corn starch/玉米淀粉 10 g Egg yolk/蛋黄 1 颗 Coconut oil or Butter/椰子油/黄油 30 g
Coating Glutinous rice flour 20 g
Instructions: Make the Snow skin dough 1. In a large bowl, combine milk, sugar, and oil together, then add the dry ingredients into the milk mixture, mix well 2. Strain the mixture and set it aside for 30 minutes. Cover the bowl with plastic wrap and steam over with high heat for about 25~30 minutes until the mixture becomes transparent. Transfer the bowl on a flat surface, and stir the mixture with the chopsticks clockwise forcefully for a few minutes until the texture becomes smooth. Set it aside and let it cool completely.

Making the Custard filling 1. Drain the pineapple from the can and add everything except coconut oil/butter into the blender 2. Blend the mixture into a creamy texture and transfer it into a fry pan. Cook the mixture over high heat until it’s boiling and turn the heat into medium low, stir the mixture constantly. Add coconut oil/butter into the mixture and keep stirring it until the texture becomes thick, this process may take 15~20 minutes. 3. Set the mixture aside after the it becomes thick and smooth, let it cool completely.

Make the coating Stir the glutinous rice flour into a saucepan over medium low heat until the flour turns light yellow, remove it from the heat. Set aside and let it cool down.
Let’s Put Everything Together, Yeah! I know it’s not easy, but hey, you have come this far, let’s move on to our final stage.
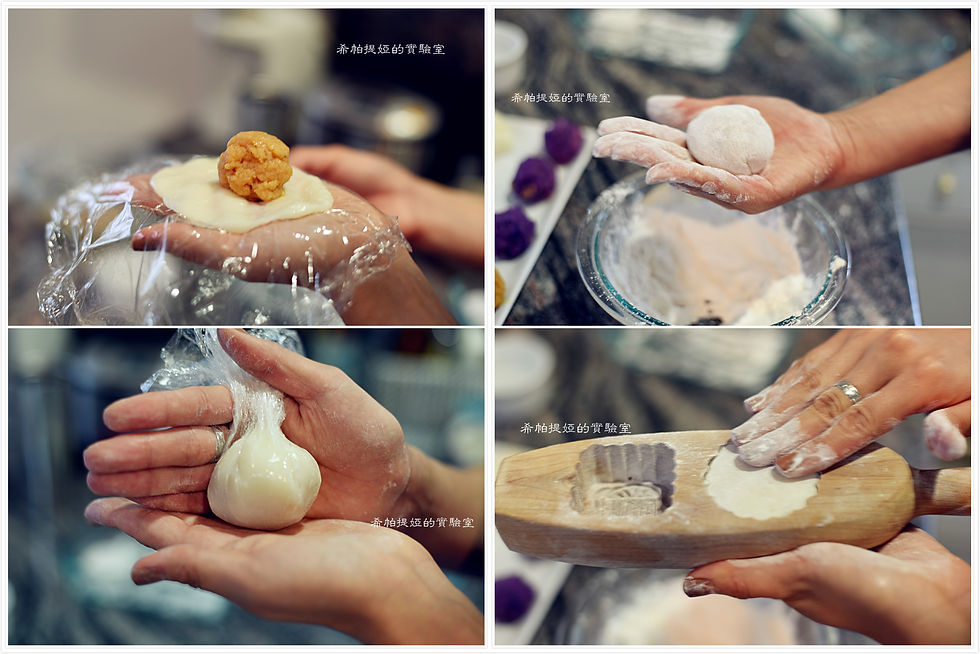
1. Measure out the snow skin dough 35 grams and the custard filling 30 grams, (i have made some purple yam filling that day also), shape the snow skin and fillings into balls. 2. Use the plastic wrap to shape the snow skin into a flat wrapper, place the filling in the middle of the wrapper and seal the ball completely. 3.Dust the ball into the coating flour, and place it into the mooncake mold, press the mooncake to fill completely. Then gently remove the mooncake from the mold. Store the mooncakes into a container with a lid on and refrigerator it for over 24 hours.
~ Enjoy your hard work ~

~Special thanks to my younger brother Joshua who shot those fabulous photos~
If you have any questions, feel free to comment below, i will respond asap. thank you all for stopping by.


Comments